Tools of the Trade
Day Twenty-One: Cutting Table
A few years ago, I spent each day in January writing about a different tool I use in my maskmaking. As I am currently redesigning my entire website in the new year, I thought it might be nice to revisit this project. Each day in January 2021, I’ll share a different item that I use in my studio. I hope some of these can help other people who are interested in making wrestling masks.

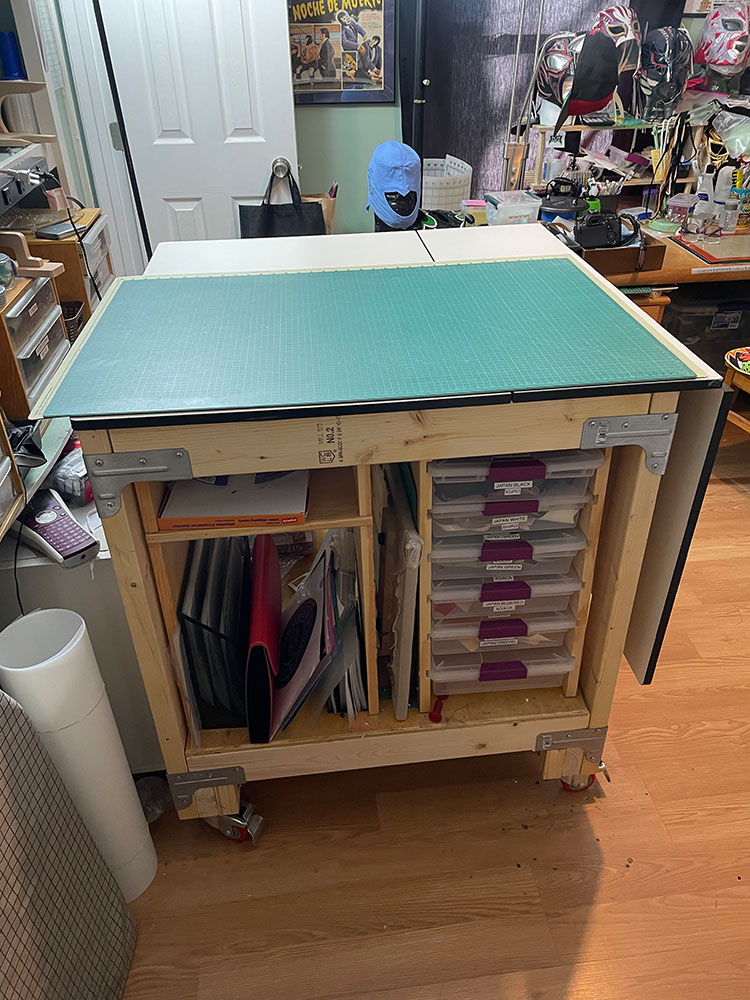
I used to own this cutting table from JoAnn’s. It was nice (although not $200 nice! I surely didn’t pay that much for it!)—it has two sides that can be folded up or down independently, so you can have two sizes of cutting areas or fold them both down and store the table away. I managed to knock the thing over one time, and it was wonky after that. It was also a bit low for my comfort, as I’m 6’1″. So I decided to make my own cutting table!
I googled a number of tutorials on how to build your own work table, and ended up taking a couple of elements from different ones, and added a few of my own touches. I’m not an experienced woodworker or carpenter, but I managed to get everything together pretty well (with a few bumps along the way!) It’s primarily constructed of 2x4s, so it’s good and solid. It’s also bigger than the doorway, so I constructed the whole thing inside the room, and now I can never move into another house.

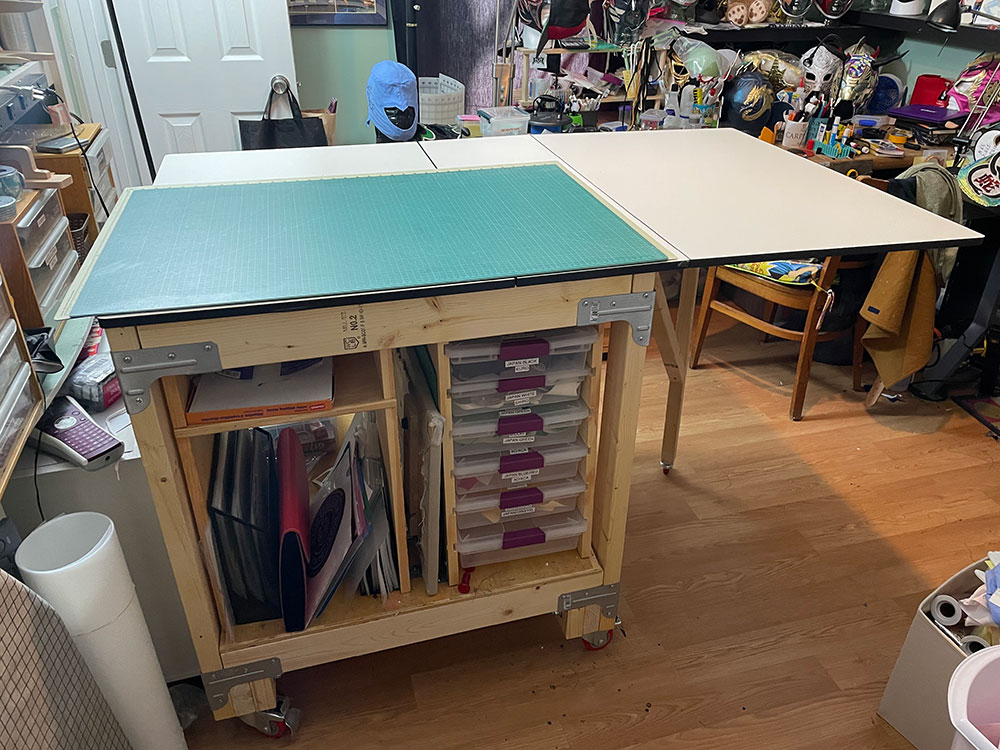
I took the top off that cutting table from JoAnn’s and used it for my new table. I used the skinny section and one of the leaves as my permanent top, and constructed a swinging wheeled support to hold the other folding leaf. 95% of the time I just use it with that section folded down, but it’s nice to have that extra length when I need it.
The top of the table is right at 98 cm, just below my waistline, so it’s just perfect for me now. I don’t have to lean way over to cut things, and I’ve noticed I feel a lot better after marathon cutting sessions. I have a big self-healing cutting mat on there, so it’s really convenient (and decadent!) to just be able to grab a craft blade and start slicing away at things without having to pull out equipment and make space.

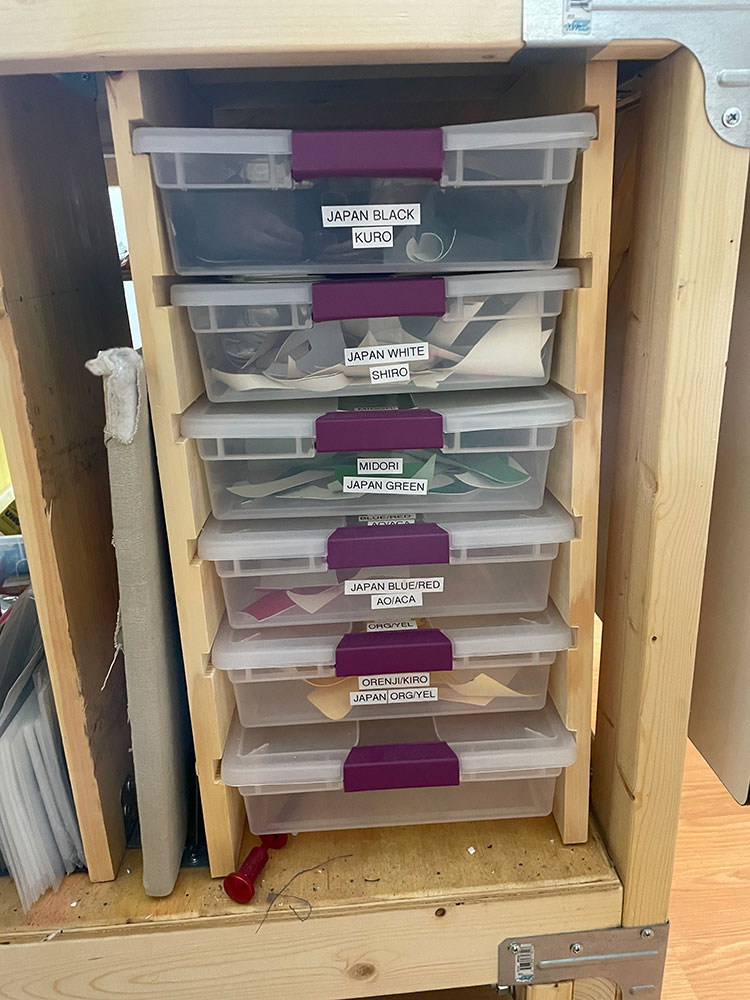
I found a really good deal on a router a while back, and came up with this idea for additional storage. I routed parallel grooves across two pieces of shelving board, and spaced them so that I could slide these locking plastic boxes in there, and they’d stay up on their own. (Home Depot had these boxes on clearance, five for $2. I bought like 15 of them—wish I had bought more!) I store my scraps of Japanese patent vinyl in there, sorted by colour. There’s a matching set of boxes on the other side where I store various offcuts of holo vinyl—never throw away anything except the tiniest scraps!)
Next to this stack is just a two-level wooden shelf I made. One side has cardstock up top with clear folders and pattern files underneath, and the other side has my storehouse of adhesives. The space between the two sets of shelves is perfect for storing an oversized ironing pad I made.
Amusingly, I forgot to account for the depth of the 2x4s that make the sides of the cutting table, and had already screwed the top of the table down before I put these shelves in. They wouldn’t just slide in, so I had to cut a huge wedge off the back corners of the shelves so I could leverage them into place. Oops!

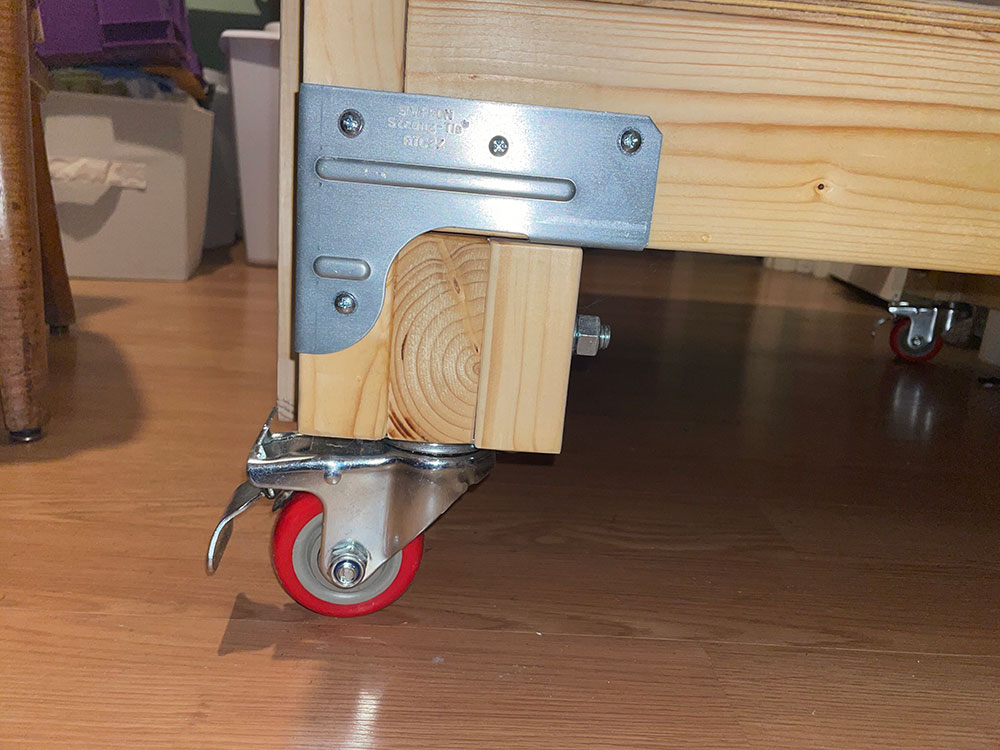
One of the key ideas I used from one of the tutorials I found was the use of these galvinized corners designed for attaching 2-by-4s together. They provide strength, help keep things straight, and I think they look really cool. I also put these big red rubber wheels on the legs so I can move the table around to get to the storage behind where it usually sits. The wheels swivel 360 degrees and lock in place so that table isn’t going anywhere if I don’t want it to!
Like I said before, I’m no carpenter, so I felt extra proud of what I constructed here! I use it every day and it’s one of my best tools.
